
There’s no denying that being able to eliminate bugs is a very good idea. It’s certainly not an easy thing to identify and eliminate those pesky insects, but with the right approach and a good set of options, results can be quite astonishing. A bug zapper will help you deal with indoor pests and even outdoor ones in no time.
Thankfully, there are plenty of options to be had here, and the best part is that you can easily eliminate any issues that may appear with help from these units. That doesn’t mean they are perfect.
They do have their ups and downs, which is why investing in a good one will be a good idea. Yet you still need to do some maintenance and cleaning for these units, which is a crucial aspect of owning such a thing in the first place.
Step. 1 – Step By Step Bug Zapper Cleaning Process
How Can You Do Bug Zapper Cleaning?
It’s not exactly that hard to do bug zapper cleaning. The first thing you want to know is when you have to clean your unit in the first place. You don’t want to waste your time cleaning it every day, but at the same time, you want to avoid situations when it’s full and dirty.
The focus here is to do it ever so often, once a month would be a good start here. If you can do it more than once a month, that’s even better. But the value will definitely be worth it as long as you invest in such a unit the right way.
Yes, you may forget to clean it often, but once a month and more specifically at the end of the month should be more than ok. You may still want to try and clean this regularly. It’s a very good investment and option, one that you will like a lot. When you clean your bug zapper you will need the following materials:
DON’T FORGET
Be sure to unplug the unit before cleaning or servicing.
Important Materials For Cleaning Bug Zapper
- A mask
- A pair of hand gloves
- An eye-protective glass
- A small soft brush
- Vacuum cleaner
- Portable hair dryer/compressed air
- Portable garbage collector
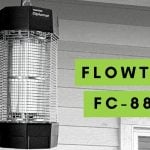
Flowtron bug zappers are equipped with patented self-cleaning grids and require no special maintenance other than cleaning insect debris from the bottom of the unit. The way you clean the unit is not that hard.
You first need to unplug it, obviously. The idea here is that you want to make sure that everything is safe and you don’t deal with any dangerous situations.
Use a soft bristle brush to brush all the debris from the cage. You don’t want to brush it too hard, as it can lead to various types of damage on the unit. The idea here is to make sure that you use a softer brush so you won’t cause any damage to the bug zapper.
Once you are done, get the vacuum cleaner so you can eliminate the debris from your cage. You want to use the vacuum cleaner on the shocking grid here.
If that doesn’t work for some reason, you can still use canned air to get the same effect. The idea is that it will blow the debris away and you get to have the bug zapper ready for action once again.
Whether you want to suck the debris with a vacuum cleaner or spread it with the canned air, that’s up to you. But it’s definitely worth it, and it brings in front some really interesting opportunities and ideas for you to explore.
“Do not clean your insect killer with a water spray.”
– The pest hunter –
Things To Consider
The bug zapper won’t really benefit if you use soap and water. Keep in mind that this is an electric unit. So the last thing you want to have here is any sort of electrocution. It can happen, especially if you want to use water. Even if you plan on drying it out, you risk destroying the unit. The bug zapper is amazing to use, so the first cleaning option we shared is a lot better and safer.
At the same time, you don’t want to keep the bug zapper connected to the current when you don’t want to use it. Each unit like this has a particular lifetime, and you may end up shortening it for this particular unit. That’s why taking your time with this is a much better option, so try to use that to your own advantage.
Step. 2 – Maintenance Ideas And Tips
When it comes to bug zapper maintenance, there are some things to keep in mind. One of the items that end up breaking is the fuse. The fuse is definitely important, so any type of damage can easily be problematic for the unit. The thing you want to do here is to replace the fuse immediately if needed.
Another good idea is to see if there are sparks between the grid bars. If that happens, you need to adjust the grids so they won’t touch one another. It’s a crucial aspect to take into consideration, and that can definitely bring in front some amazing benefits and opportunities.
There are some Bug Zapper models that include self-cleaning grids. The idea here is to make sure that you use those. Not all bug zappers have such a thing, but if your unit has one, then you should definitely use that to your advantage.
Of course, it’s important to study the manual and see if there are any kind of issues that you need to know about. The more you know about the unit, the better the results will be in the end. You don’t want to rush the process, but bug zapper maintenance has to be fast and you also need to do it often.
Changing the bulbs and checking the fuse is really important. Every piece can malfunction at times, which is why you have to know how to use and maintain such a product. As long as you don’t rush with this, the results can be more than ok. You definitely have to keep that into consideration if you want to purchase a bug zapper.
Step. 3 – Change or Replace The Spare Parts
Starters
The starter can be found as a little diode connected to the bulb socket via two copper leads. Installation is as simple as removing the existing two leads with small needle nose pliers and inserting the new starter. FYI, starters have a burnt look when new.
Transformer and Ballast Assembly
This assembly consists of a square frame with the transformer and ballast already mounted in place. Simply remove the old assembly by removing the two screws that hold the frame down (flat head screwdriver), and disconnecting the wires running to the bulb socket and killing grid. Screw in the new assembly and reconnect the wires.
Step. 4 – Bug Zapper Accessories
Attractants – Octenol
Octenol, a component of respiration, is effective in attracting mosquitoes and many other species of biting flies. Flowtron bug zappers utilize an exclusive slow-release octanol mosquito cartridge, which increases the effectiveness of the bug zapper 5 times!
Mounting Brackets & Poles
An attractive bracket or pole provides a secure way of hanging your bug zapper. Bug zappers should be mounted at a height of around six to eight feet above the ground and 25 to 50 feet away from the area intended for human activity. Position the insect killer between the source of insects (woods, lowlands, etc.) and the area to be protected.
Our Last Opinion
After all, every item needs a lot of care and work on it. Yes, it can take a while until you get accustomed to doing regular maintenance on this unit. But it’s a really good idea to do that, especially if you want the bug zapper to last for many years. So yes, use these tips and it will be easy to get the right results from your bug zapper!


I do accept as true with all the concepts you’ve introduced in your post. They are really convincing and can definitely work. Nonetheless, the posts are too short for novices. May you please prolong them a little from subsequent time?
Thank you for the post.
Thank you for sharing your thoughts. I really appreciate your efforts and I will be waiting for your next write ups thank you once again.
Hi, I read your blog daily. Your writing style is witty, keep it up!